Log in to your Kaltura.com account
Choose a Kaltura Account
Account Secrets
Meetabout is a web app that facilitates virtual meetings between strangers to discuss shared interests. So, if two people decide to meet to talk about X, Meetabout leverages the easy-to-use Virtual Meeting Room API to host the meeting on the Kaltura platform.
Meetabout is a sample application not intended to run in a production environment in its current state.
https://meetabout.herokuapp.com/
npm install.env.template to .env and populate the following required fields (other fields in the file are not required to run this app):SESSION_SECRET= #Key used for encrypting session cookies
SERVER_HOST_URL=http://localhost:3000
MONGO_URI= #mongodb+srv://
KALTURA_SERVICE_URL=https://www.kaltura.com
KALTURA_ADMIN_SECRET= #obtained from https://kmc.kaltura.com/index.php/kmcng/settings/integrationSettings
KALTURA_PARTNER_ID=#obtained from https://kmc.kaltura.com/index.php/kmcng/settings/integrationSettings
KALTURA_USER_ID=#set it to the Kaltura user designated as admin. This is usually the email address you used to create your Kaltura account
npm startMeetabout requires a logged-in user to work. Any attempt to execute the app will force a modal login window to appear. The default login method uses passportjs local strategy, which is completely insecure and therefore should only run on your local machine. Of course this approach does make it very easy to get up and running quickly.
Note: If you want to run Meetabout as a production app, comment out router.post('/', in routes/auth_local.js and implement other authentication strategies. For example, the GitHub, LinkedIn, Microsoft and Google OAuth strategies are implemented in routes/auth_<x> and you can uncomment those routes from app.js. You would also need to create OAuth credentials for those services and supply the keys in .env.
Once logged in, you can begin using the app!
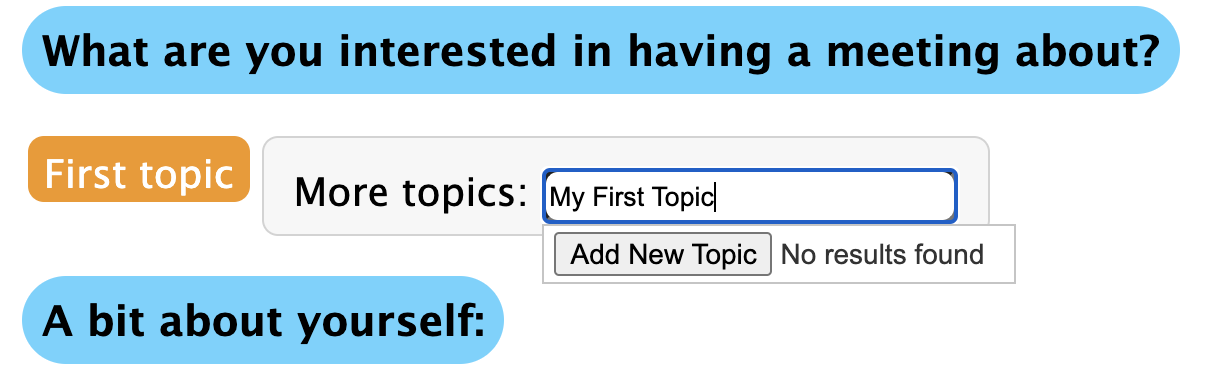
Begin by creating a topic to have a meeting about! Enter a topic into “More Topics” and press “Add New Topic”.
When clicking on the “Find Meetings” button, there will not be anyone to meet with. To find a (pseudo) partner, open another browser, log in with a different user, and subscribe to the topic you created with both users. After both users join, they will be able to see one another!
The UI will look like this:
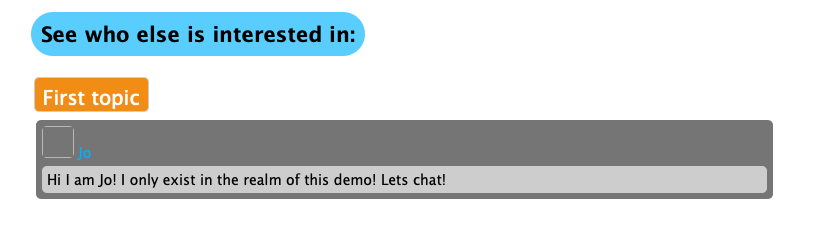
Click on the other user to go to the meeting page.
The meeting page is the location within Meetabout where meetings take place on a given topic. It consists of:
A meeting page will look like so:
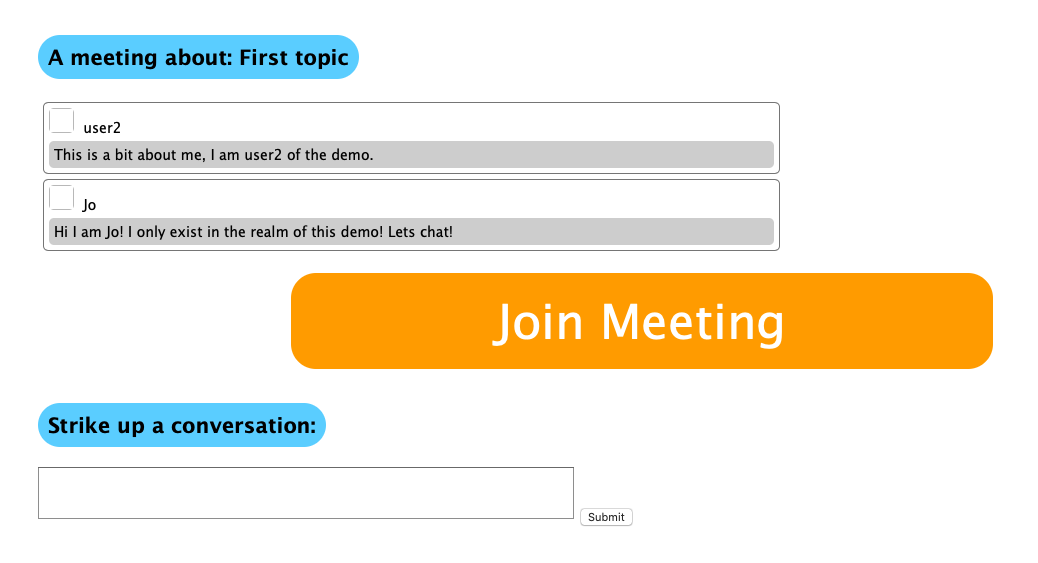
If any user on this meeting page clicks on the “Join Meeting” button, they will enter a live, virtual meeting room:
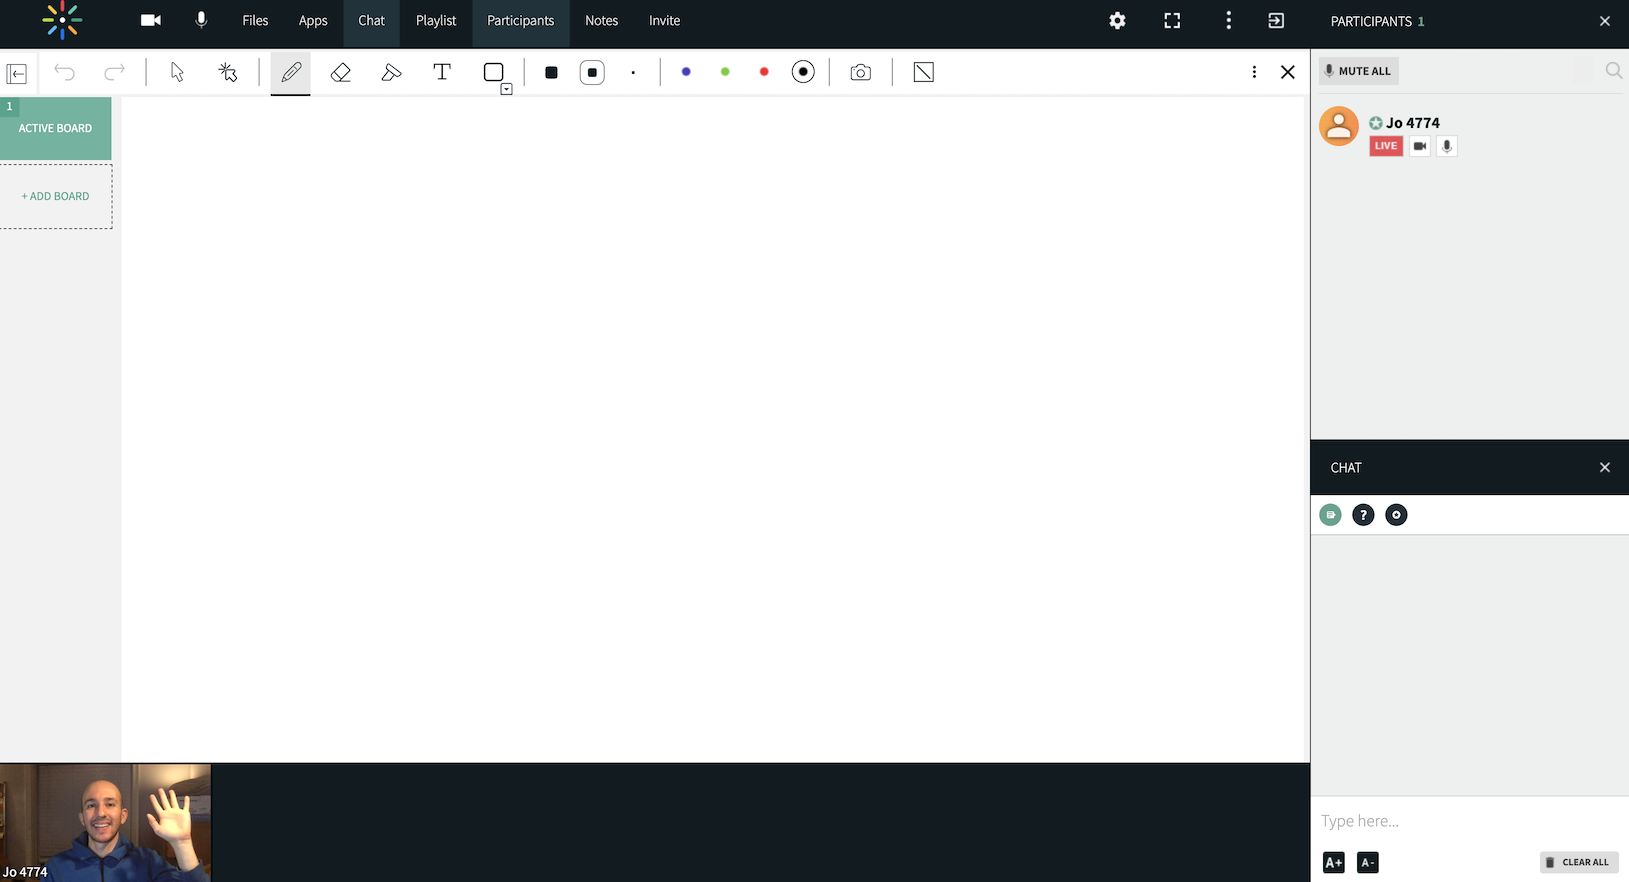
A Kaltura virtual meeting room is created and joined through a series of API calls, described in detail in the integration guide. The Virtual Room Manager App is another helpful tool to understand its usage.
Now, let’s walk through the Meetings API, as it relates to Meetabout.
To create a new meeting, we are routed to /routes/meetings.js which calls the createRoom function in /lib/createroom.js:
createRoom(topicName, function (kalturaResponse) {
kaltura.services.session.start creates a Kaltura Admin Session which is needed to create the virtual room:
// Create the virtual room
let scheduleResource = new kaltura.objects.LocationScheduleResource();
scheduleResource.name = topicName;
scheduleResource.tags = "vcprovider:newrow";

kaltura.services.scheduleResource.add(scheduleResource)
.execute(client)
Notice that the topicName from Meetabout is passed as the topic of the Virtual Room.
The call to kaltura.services.scheduleResource.add(scheduleResource) creates a resource, which is Kaltura’s terminology for a virtual room. The resource has an ID which is saved to the Mongo Meeting Model in /routes/meetings.js
createRoom(topicName, function (kalturaResponse) {
      new Meeting({
        topic: topicId,
        user1: uid1,
        user2: uid2,
        kalturaResourceId: kalturaResponse.id
      }).save(function (err, doc) {
The virtual meeting room has now been created and is ready to be used!
Some preparation is needed to join the resource or virtual meeting room. The room needs to know your identity and your user type. Kaltura can designate meeting users as either admins or viewers, where the admins have special privileges. However, in Meetabout, both users are treated as equals and both will be made admins.
In order to identify a user to the room, we need to create a Kaltura Session with some metadata related to the Virtual Meeting Room API, and this is kicked off from /routes/meetings.js right after .save from above by calling:
joinRoom(kalturaResponse.id, user.name, user.email, function (joinLink) {
This then calls /lib/joinroom.js to create a Kaltura Session and authenticates the user that clicked the “Join Meeting” button.
The URL scheme for the room follows the convention for virtual meeting rooms and is created in /lib/joinroom.js:
let roomUrl = "https://" + partnerId + ".kaf.kaltura.com/virtualEvent/launch?ks=" + result;
The ks is a string representing the Kaltura Session for the user for this meeting room. And the partnerId is your Kaltura VPaaS account’s partner ID.
And that is it! The URL is ready to use to join the room! It is passed back to the meeting webpage and into the href of the “Join Meeting” button!
And by the way, this link can also be embedded in an iframe inside your own application for a fully integrated experience!
Note: this step is unrelated to the usage of the Kaltura Virtual Room API
A production app would use an SMTP server at a company, or an SMTP service. For testing purposes, you can sign up for a free account at ethereal and fill out the following fields in .env:
SMTP_HOST=smtp.ethereal.email
SMTP_USER=
SMTP_PASS=
SMTP_PORT=587
